Split a series
You can divide a series of images into multiple series. This can be useful if the images need to be reviewed by different specialists.
- In the QC viewer, select Split Series from the toolbar.
- Select a series. You can only select a series that can be divided.
- The Split Series window opens. If the study contains multiple series, they are shown in the side panel.
The Split Series window contains the following sections.
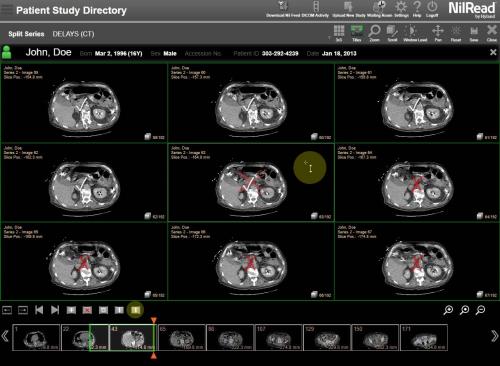
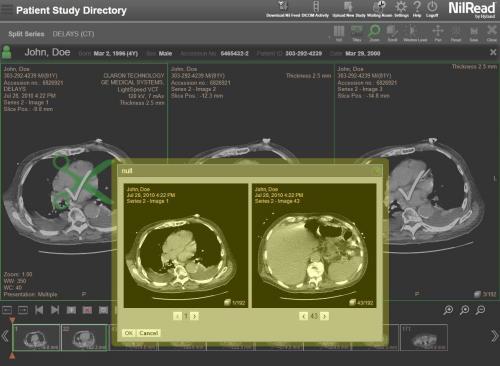
Preview window
The preview window at the top of the screen shows previews of the images in the series. You can select different layouts for the preview window (such as 1x1 or 5x5) using the toolbar.
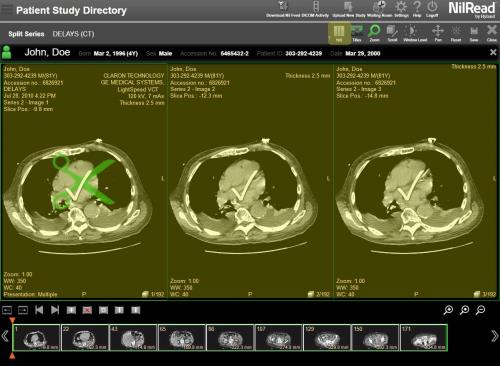
To scroll through the images in the series, use the Scroll tool in the preview window. You can also use standard tools such as titles, zoom, window level, pan and reset to adjust the images.
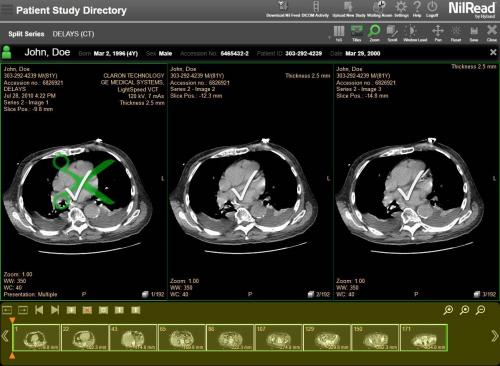
Icons are shown on the images in the preview window to indicate if they will be included in the new series.
- Green scissors indicate the first image to be included in the new series.
- A checkmark indicates the image will be included in the new series.
- A red X indicates the image will not be included in the new series.
- Red scissors indicate the last image to be included in the new series.
You can use the preview area to quickly select a range of images for the new series. For details, see Quickly select a range of images.
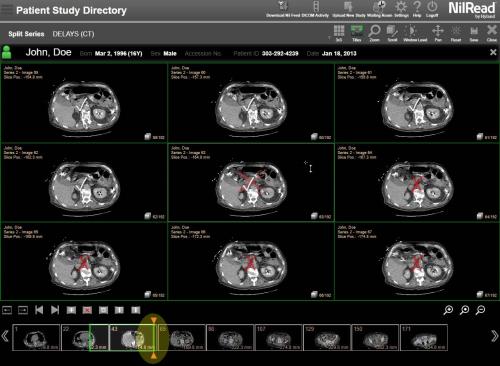
Segment editor
The segment editor at the bottom of the screen contains thumbnail samples across the entire series.
Use the following tools to change the number of samples shown in the segment editor.
|
|
Generate more samples across the entire series. |
|
|
Generate the most samples that will fit in the segment editor. |
|
|
Generate less samples across the entire series. |
If you have generated more samples, use the arrows at each end of the segment editor to scroll through the samples. You can also hold SHIFT while dragging the editor. On touch devices, use a two-finger drag.
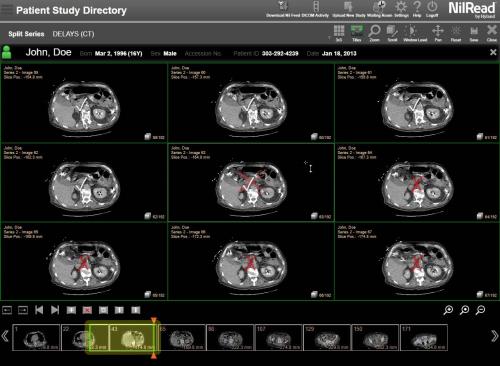
Segment Box
Use the segment box in the editor to select the images you want to include in the new series. By default, all of the images are included.

You can resize and move the segment box. You can also add more boxes, allowing you to select images throughout the series. The following example contains three boxes. These three groups of images will be included in the new series.

Hover over a box to view the range of images within the box.

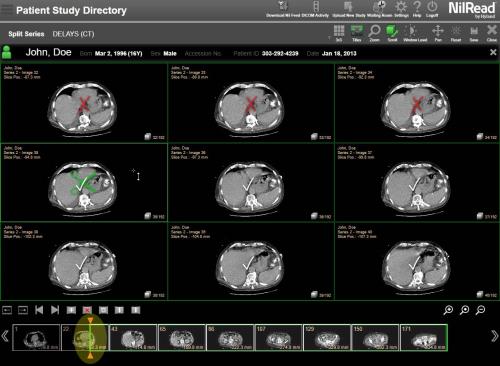
Position Indicator
The position indicator in the editor is synchronized with the preview window.
- When you select an image in the preview window, the position indicator moves to the corresponding location in the editor.
- When you move the position indicator in the editor, the preview window is updated to the same location. For more information, see Move the position indicator.
By default, the position indicator is located at the start of the series.

Quickly select a range of images
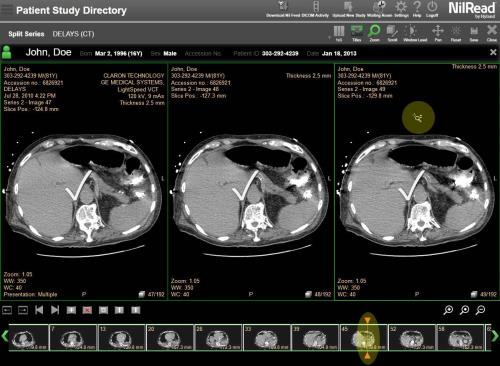
Use the preview window to quickly select a range of images to include in the new series.
- Change the preview layout to display more images (for example, 3x3 or 5x5).
- In the preview window, find the first image in the range (use Scroll to move through the images). Click (or tap) the image, then select Set Segment Start.
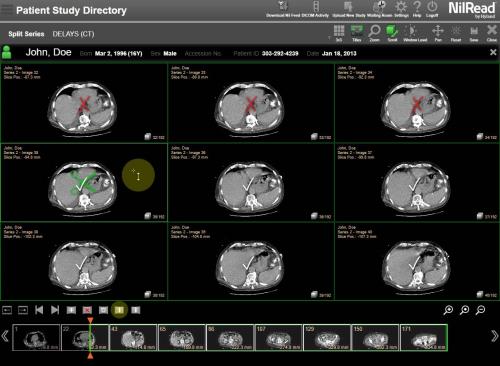
In the segment editor, the segment box is adjusted to start at this image. The position indicator is moved to this location as well.
- In the preview window, find the last image in the range (use Scroll to move through the images). Click (or tap) the image, then select Set Segment End.
In the segment editor, the segment box is adjusted to end after this image. The position indicator is moved to this location as well.
- The range of images is now selected in the segment editor.
- If desired, use additional segment boxes to select more images. For details, see Select non-contiguous images.
- When done selecting images, save the images as a new series. For details, see Save the new series.
Move the position indicator
Use the position indicator to locate images and display them in the preview window. You can also use the position indicator to select images (for details, see Select images).
Use the following methods to move the position indicator.
-
Click (or tap) an image in the preview window. The position indicator moves to the image location.
- Drag the position indicator to a new location on the editor.

- Click (or tap) above or below the thumbnails to move the position indicator to that location.

- To move the position indicator to the start of the series, select
 . To move the position indicator to the end of the series, select
  .
.

- Use
 and
and  to move the position indicator forwards or backwards frame-by-frame. You can click (or tap) and hold these icons to continue moving frame-by-frame.

Select images
Use the following methods to change the range of images included in a segment box.
Edit a segment box
- Right-click (or touch and hold) the box, then select Edit.
-
The first and last images included in the box are shown. Hover over an image to view detailed information about the image attributes.
- Use the arrows to change the first and last images. Click (or tap) and hold an arrow to quickly scroll through the images in the series.
- Select OK.
Resize a segment box
Drag the ends of the box to resize it.

Move a segment box
Drag the box to a new position.

Set the start of a segment box to the position indicator
To set the start of the box to the position indicator location, select the box, then select Set Segment Start.

Set the end of a segment box to the position indicator
To set the end of the box to the position indicator location, select the box, then select Set Segment End.

Select non-contiguous images
You can use multiple segment boxes to select non-contiguous images. You can add as many boxes as needed.
Add a segment box
To add a box, select ![]() . A new box appears to the right of the position indicator. (If a box already exists at the position indicator, the new box appears to the right of the existing box.) Change the box position and size as needed.
. A new box appears to the right of the position indicator. (If a box already exists at the position indicator, the new box appears to the right of the existing box.) Change the box position and size as needed.

Note that if boxes overlap, they will be merged together when the new series is saved.

Remove a segment box
To remove a box, select the box, then select ![]() . Note that you cannot remove all boxes; at least one box must remain in the editor.
. Note that you cannot remove all boxes; at least one box must remain in the editor.

Save the new series
The images you have selected (using segment boxes) will be saved as a new series. You can also choose to remove the images from the original series.
- Select Save from the toolbar.
- To remove the images from the original series, select Delete original instances.
or
To keep a copy of the images in the original series, deselect Delete original instances.
- Enter a Series Description and Series Number for the new series.
- Select Save.
Return to the QC viewer
To return to the QC viewer, select X in the top-right corner (beside the patient information).