Manage DICOM attributes
You can modify DICOM attributes for a patient, study, series or image. For example, you may need to correct a patient’s name. You can also add and delete attributes.
Note
Changes to attributes, including additions and deletions, will not be permanently applied until you select Save.
DICOM attributes conform to the following hierarchy: (1) patient, (2) study and (3) series. When you choose to edit DICOM attributes at one of these levels, attributes at the other levels are available for editing as well.
- Select DICOM (toolbar).
- Select
 on a patient row. This opens the DICOM attributes with the patient selected.
or
Select
on a study row. This opens the DICOM attributes with the study selected.or
Click (or tap) a series. This opens the DICOM attributes with the series selected.
- The DICOM Explorer opens in a new browser tab.
The left pane shows the hierarchy of DICOM attributes (patient, study, series, images). Note that the
 icon is shown for multiframe images.
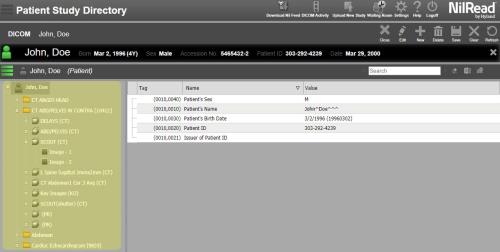
- Select an item in the left pane. The item’s DICOM attributes are shown in the right pane. For example, select a patient to view the patient’s attributes. If you select an image, all of the attributes related to the image are shown (patient, study, series and image).
- To reload the DICOM attributes and view the latest changes made by all users, select Refresh. Any unsaved changes you have made will be lost.
- To customize the columns in the right pane:
- Select Customize
 in the top-right corner. To add a column, drag a column from the Customize list to the location where you want to place it. To remove a column, drag it to the Customize list.
 - Click (or tap) a column heading to sort the attributes. Click (or tap) the column heading again to sort the attributes in the reverse order.
- To rearrange the columns, drag a column heading to a new location.
- Select Customize
Find an attribute
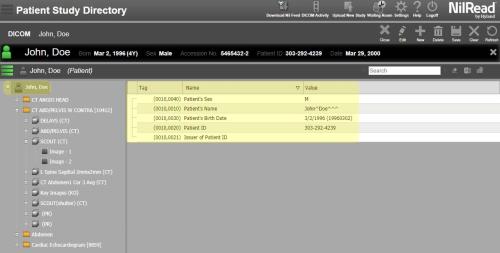
If there is a long list of attributes in the right pane, use the Search box to find an attribute.
- Enter your search text in the Search box and press ENTER.
- Attributes matching your search text are highlighted. Use the arrows on each side of the Search box to go to the next or previous match.
- Select Clear
 beside the Search box to clear your search text and the highlighted matches.
Modify an attribute
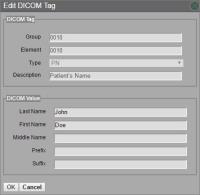
- Select an attribute in the right pane, then select Edit. You can also right-click (or touch and hold) the attribute, then select Edit.
- The Edit DICOM Tag window appears. The DICOM Tag area shows the DICOM tag information. The DICOM Value area contains the values you can modify. Make your changes, then click OK.
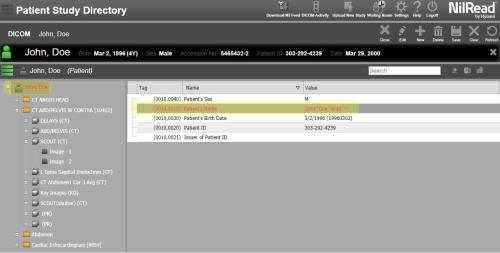
- The modified attribute is shown in red in the right pane.
The item the attribute belongs to (patient, study, series or image) is shown in red in the left pane.
- To save your changes, select Save. All attribute changes, additions and deletions you have made will be saved. If you do not want to save your changes, select Clear.
Add an attribute
You can add a DICOM attribute to a patient, study, series or image.
- Select a patient, study, series or image in the left pane.
- Select New. The Add DICOM Tag window appears.
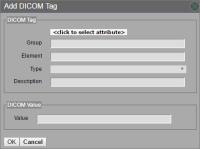
- Select <click to select attribute> and select the attribute you want to add. To search for an attribute, type all or part of the attribute name in the Search box.
- When you select an attribute, the DICOM Tag area shows the DICOM tag information. The DICOM Value area contains the values you can modify. If the attribute already exists, the current values are shown in the DICOM Value area and can be modified.
- Make your changes, then select OK. The new attribute is shown in red in the right pane. The item the attribute belongs to (patient, study, series or image) is shown in red in the left pane.
- To save your changes, select Save. All attribute changes, additions and deletions you have made will be saved. If you do not want to save your changes, select Clear.
Delete an attribute
- Select an attribute in the right pane, then select Delete. You can also right-click (or touch and hold) the attribute, then select Delete.
- To save your changes, select Save. All attribute changes, additions and deletions you have made will be saved. If you do not want to save your changes, select Clear.
Save attributes in a spreadsheet
Select an item (patient, study, series or image) in the left pane, then select Export ![]() in the top-right corner. Follow your browser instructions to save the file.
in the top-right corner. Follow your browser instructions to save the file.
Return to the QC viewer
To return to the QC viewer, select X in the top-right corner (beside the patient information).